文档参考来源自 ISPconfig 官方文档 http://www.ispconfig.org
1.安装基本系统
选择第一项,安装或升级现有系统
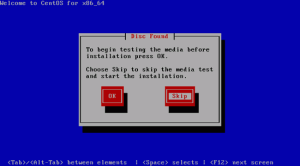
选择 Skip 取消光盘校验
欢迎界面,点击 Next
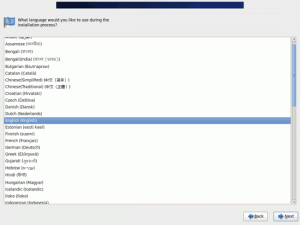
选择语言,英文,继续
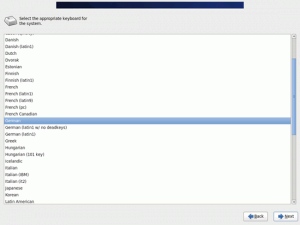
选择键盘布局,默认English US 即可,注意图中是Geman 德语
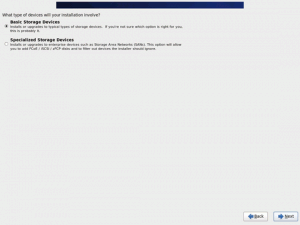
选择存储设备,通常选择 Basic Storage Devices 即可
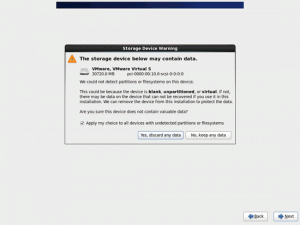
对于未格式化的新硬盘可能会提示是否丢弃数据,选择 Yes Discard any data
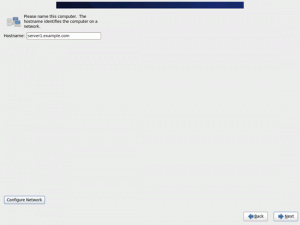
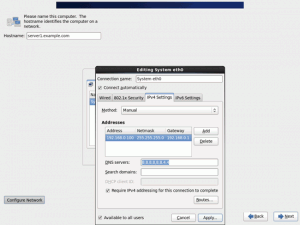
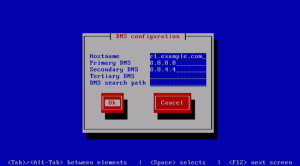
配置主机名
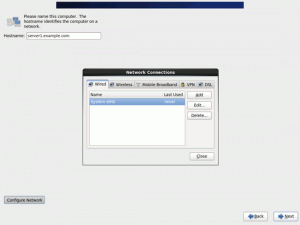
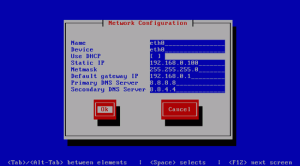
然后配置网络,需注意勾选 Connect automatically 自动连接,否则开机需要手动连网
配置IP地址和DNS
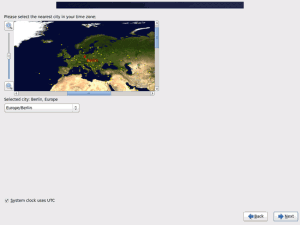
设置区域,中国默认选择 Asia/ShangHai 图中是欧洲时区
设置Root 管理员用户密码
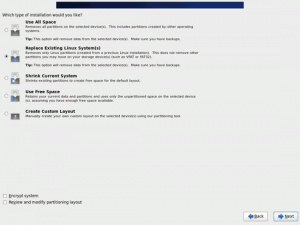
这里可以选择安装类型,如果需要自定义分区结构可以选择最后一项
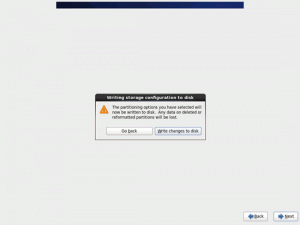
提示是否写入磁盘配置信息,默认写入即可
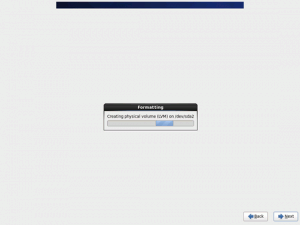
开始自动格式化磁盘分区
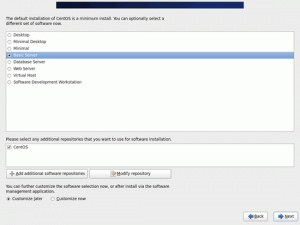
选择安装类型,这里分别为 桌面,最小桌面,最小安装,基础服务器,数据库服务器,WEB服务器,虚拟主机,软件开发工作站,选择 Basic Server 即可
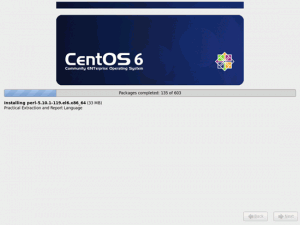
开始安装如那件包,直到完成
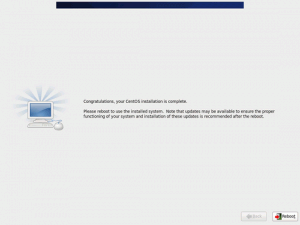
安装完成,光盘会自动弹出,取出,后点完reboot 重启
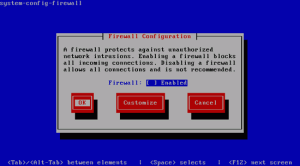
以root 用户登陆系统,默认Centos 会启动防火墙,为了配置上的方便你可以关闭防火墙
执行 system-config-firewall-tui
取消 Enabled 选框,点OK确认,接下来会弹出警告,选择Yes 即可
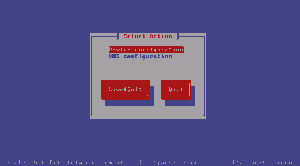
如果需要修改网卡或DNS配置信息,可以
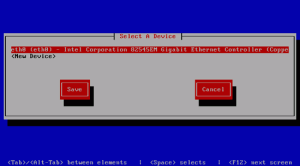
执行 system-config-network
选择后进行手动分配固定IP地址或选择DHCP
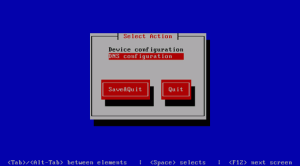
根据电信运营商填写DNS信息,这里用的谷歌的DNS
8.8.8.8 和 8.8.4.4
配置完成后,可以使用ifconfig 命令查看网卡配置信息
[root@server1 ~]# ifconfig
eth0      Link encap:Ethernet  HWaddr 00:0C:29:00:85:AC
          inet addr:192.168.0.100  Bcast:192.168.0.255  Mask:255.255.255.0
          inet6 addr: fe80::20c:29ff:fe00:85ac/64 Scope:Link
          UP BROADCAST RUNNING MULTICAST  MTU:1500  Metric:1
          RX packets:278 errors:0 dropped:0 overruns:0 frame:0
          TX packets:86 errors:0 dropped:0 overruns:0 carrier:0
          collisions:0 txqueuelen:1000
          RX bytes:28503 (27.8 KiB)  TX bytes:16360 (15.9 KiB)

lo        Link encap:Local Loopback
          inet addr:127.0.0.1  Mask:255.0.0.0
          inet6 addr: ::1/128 Scope:Host
          UP LOOPBACK RUNNING  MTU:16436  Metric:1
          RX packets:0 errors:0 dropped:0 overruns:0 frame:0
          TX packets:0 errors:0 dropped:0 overruns:0 carrier:0
          collisions:0 txqueuelen:0
          RX bytes:0 (0.0 b)  TX bytes:0 (0.0 b)

[root@server1 ~]#
查看DNS配置信息
cat /etc/resolv.conf
127.0.0.1 localhost localhost.localdomain localhost4 localhost4.localdomain4 192.168.0.100 server1.example.com server1
::1 localhost localhost.localdomain localhost6 localhost6.localdomain6
关闭Selinux
vi /etc/selinux/config
将Selinux =enforcing 更改为 disabled
安装EPEL 扩展YUM源
rpm -ivh http://dl.fedoraproject.org/pub/epel/6/x86_64/epel-release-6-7.noarch.rpm
执行 yum update 进行系统升级,同时再执行 yum groupinstall 'Development Tools' 安装开发工具
开启磁盘配额,用来限制用户站点空间大小
yum install quota
编辑 fstab 文件
vi /etc/fstab
在 根分区 / ext4 defaults 后面添加 ,usrjquota=aquota.user,grpjquota=aquota.group,jqfmt=vfsv0
如下所示
#
# /etc/fstab
# Created by anaconda on Wed Aug 22 18:24:12 2012
#
# Accessible filesystems, by reference, are maintained under '/dev/disk'
# See man pages fstab(5), findfs(8), mount(8) and/or blkid(8) for more info
#
UUID=53b2625e-f7ed-49ce-8645-e3bf05ac16d4 /                       ext4    defaults,usrjquota=aquota.user,grpjquota=aquota.group,jqfmt=vfsv0        1 1
UUID=c5a27fb7-b6e1-40e6-aca4-1343d6f42cb2 swap                    swap    defaults        0 0
tmpfs                   /dev/shm                tmpfs   defaults        0 0
devpts                  /dev/pts                devpts  gid=5,mode=620  0 0
sysfs                   /sys                    sysfs   defaults        0 0
proc                    /proc                   proc    defaults        0 0
编辑完成后执行以下命令重新挂在根分区
mount -o remount /
执行以下命令开启磁盘配额
quotacheck -avugm
quotaon -avug
安装 Apache, MySQL, phpMyAdmin
yum install ntp httpd mod_ssl mysql-server php php-mysql php-mbstring phpmyadmin
安装Dovecot
yum install dovecot dovecot-mysql
配置Dovecot 服务开机启动
chkconfig --levels 235 dovecot on
/etc/init.d/dovecot start
安装 Postfix
yum install postfix
关闭 Sendmail ,启动 Postfix 和 MySQL:
chkconfig --levels 235 mysqld on /etc/init.d/mysqld start
chkconfig --levels 235 sendmail off
chkconfig --levels 235 postfix on
/etc/init.d/sendmail stop
/etc/init.d/postfix restart
安装getmail
yum install getmail
配置MySQL
执行 mysql_secure_installation 按照以下提示进行配置
NOTE: RUNNING ALL PARTS OF THIS SCRIPT IS RECOMMENDED FOR ALL MySQL SERVERS IN PRODUCTION USE! PLEASE READ EACH STEP CAREFULLY!
In order to log into MySQL to secure it, we'll need the current password for the root user. If you've just installed MySQL, and you haven't set the root password yet, the password will be blank, so you should just press enter here.
Enter current password for root (enter for none): OK, successfully used password, moving on...
Setting the root password ensures that nobody can log into the MySQL root user without the proper authorisation.
Set root password? [Y/n] <-- 回车确认
New password: <-- 输入mysql root账户新密码 Re-enter new password: <-- 输入mysql root账户新密码 Password updated successfully! Reloading privilege tables.. ... Success!
By default, a MySQL installation has an anonymous user, allowing anyone to log into MySQL without having to have a user account created for them. This is intended only for testing, and to make the installation go a bit smoother. You should remove them before moving into a production environment.
Remove anonymous users? [Y/n] <-- 回车确认 ... Success!
Normally, root should only be allowed to connect from 'localhost'. This ensures that someone cannot guess at the root password from the network.
Disallow root login remotely? [Y/n] <-- 回车确认 ... Success!
By default, MySQL comes with a database named 'test' that anyone can access. This is also intended only for testing, and should be removed before moving into a production environment.
Remove test database and access to it? [Y/n] <-- 回车确认 - Dropping test database... ... Success! - Removing privileges on test database... ... Success!
Reloading the privilege tables will ensure that all changes made so far will take effect immediately.
Reload privilege tables now? [Y/n] <-- 回车确认 ... Success!
Cleaning up...
All done! If you've completed all of the above steps, your MySQL installation should now be secure.
Thanks for using MySQL!
配置phpmyadmin
vi /etc/httpd/conf.d/phpmyadmin.conf
加入以下内容
#
#  Web application to manage MySQL
#

#<Directory "/usr/share/phpmyadmin">
#  Order Deny,Allow
#  Deny from all
#  Allow from 127.0.0.1
#</Directory>

Alias /phpmyadmin /usr/share/phpmyadmin
Alias /phpMyAdmin /usr/share/phpmyadmin
Alias /mysqladmin /usr/share/phpmyadmin
配置phpmyadmin 验证类型
vi /usr/share/phpmyadmin/config.inc.php
[...]
/* Authentication type */
$cfg['Servers'][$i]['auth_type'] = 'http';
[...]
配置httpd 开机启动
chkconfig --levels 235 httpd on /etc/init.d/httpd start
现在你可以用浏览器浏览 http://你的服务器ip/phpmyadmin 填入mysql 用户名 root 和你的密码来进行访问
配置反垃圾邮件,防毒软件
yum install amavisd-new spamassassin clamav clamd unzip bzip2 unrar perl-DBD-mysql
配置开机启动
sa-update
chkconfig --levels 235 amavisd on
chkconfig --del clamd
chkconfig --levels 235 clamd.amavisd on
/usr/bin/freshclam
/etc/init.d/amavisd start
/etc/init.d/clamd.amavisd start
ISPConfig 3 可以使用 mod_php, mod_fcgi/PHP5, cgi/PHP5, 和suPHP 在你的网站中
如果你要安装 Apache2 和 mod_php5, mod_fcgid, PHP5 可以使用以下命令:
yum install php php-devel php-gd php-imap php-ldap php-mysql php-odbc php-pear php-xml php-xmlrpc php-pecl-apc php-mbstring php-mcrypt php-mssql php-snmp php-soap php-tidy curl curl-devel perl-libwww-perl ImageMagick libxml2 libxml2-devel mod_fcgid php-cli httpd-devel
编辑php 配置文件
vi /etc/php.ini
参照进行修改
[...]
;error_reporting = E_ALL & ~E_DEPRECATED
error_reporting = E_ALL & ~E_NOTICE
[...]
; cgi.fix_pathinfo provides *real* PATH_INFO/PATH_TRANSLATED support for CGI.  PHP's
; previous behaviour was to set PATH_TRANSLATED to SCRIPT_FILENAME, and to not grok
; what PATH_INFO is.  For more information on PATH_INFO, see the cgi specs.  Setting
; this to 1 will cause PHP CGI to fix its paths to conform to the spec.  A setting
; of zero causes PHP to behave as before.  Default is 1.  You should fix your scripts
; to use SCRIPT_FILENAME rather than PATH_TRANSLATED.
; http://www.php.net/manual/en/ini.core.php#ini.cgi.fix-pathinfo
cgi.fix_pathinfo=1
[...]
安装SuPHP
cd /tmp
wget http://suphp.org/download/suphp-0.7.1.tar.gz
tar xvfz suphp-0.7.1.tar.gz
cd suphp-0.7.1/
./configure --prefix=/usr --sysconfdir=/etc --with-apr=/usr/bin/apr-1-config --with-apxs=/usr/sbin/apxs --with-apache-user=apache --with-setid-mode=owner --with-php=/usr/bin/php-cgi --with-logfile=/var/log/httpd/suphp_log --enable-SUPHP_USE_USERGROUP=yes
make
make install
为apache 添加suPHP 模块
vi /etc/httpd/conf.d/suphp.conf 添加
LoadModule suphp_module modules/mod_suphp.so
vi /etc/suphp.conf 建立配置文件,输入以下内容
[global]
;Path to logfile
logfile=/var/log/httpd/suphp.log
;Loglevel
loglevel=info
;User Apache is running as
webserver_user=apache
;Path all scripts have to be in
docroot=/
;Path to chroot() to before executing script
;chroot=/mychroot
; Security options
allow_file_group_writeable=true
allow_file_others_writeable=false
allow_directory_group_writeable=true
allow_directory_others_writeable=false
;Check wheter script is within DOCUMENT_ROOT
check_vhost_docroot=true
;Send minor error messages to browser
errors_to_browser=false
;PATH environment variable
env_path=/bin:/usr/bin
;Umask to set, specify in octal notation
umask=0077
; Minimum UID
min_uid=100
; Minimum GID
min_gid=100

[handlers]
;Handler for php-scripts
x-httpd-suphp="php:/usr/bin/php-cgi"
;Handler for CGI-scripts
x-suphp-cgi="execute:!self"
重启httpd
/etc/init.d/httpd restart
安装ruby
yum install httpd-devel ruby ruby-devel
安装modruby
cd /tmp
wget http://modruby.net/archive/mod_ruby-1.3.0.tar.gz
tar zxvf mod_ruby-1.3.0.tar.gz
cd mod_ruby-1.3.0/
./configure.rb --with-apr-includes=/usr/include/apr-1
make
make install
vi /etc/httpd/conf.d/ruby.conf 添加
LoadModule ruby_module modules/mod_ruby.so
RubyAddPath /1.8
重启apache
/etc/init.d/httpd restart
安装python
yum install mod_python
/etc/init.d/httpd restart
开启webdav
vi /etc/httpd/conf/httpd.conf
[...]
LoadModule auth_digest_module modules/mod_auth_digest.so
[...]
LoadModule dav_module modules/mod_dav.so
[...]
LoadModule dav_fs_module modules/mod_dav_fs.so
[...]
/etc/init.d/httpd restart
安装pureftpd
yum install pure-ftpd
chkconfig --levels 235 pure-ftpd on
/etc/init.d/pure-ftpd start
配置pureftpd
vi /etc/pure-ftpd/pure-ftpd.conf
[...]
# This option can accept three values :
# 0 : disable SSL/TLS encryption layer (default).
# 1 : accept both traditional and encrypted sessions.
# 2 : refuse connections that don't use SSL/TLS security mechanisms,
#     including anonymous sessions.
# Do _not_ uncomment this blindly. Be sure that :
# 1) Your server has been compiled with SSL/TLS support (--with-tls),
# 2) A valid certificate is in place,
# 3) Only compatible clients will log in.

TLS                      1
[...]
安装openssl
yum install openssl
mkdir -p /etc/ssl/private/
建立ssl 存储路径
为pureftpd 建立一个证书
openssl req -x509 -nodes -days 7300 -newkey rsa:2048 -keyout /etc/ssl/private/pure-ftpd.pem -out /etc/ssl/private/pure-ftpd.pem
Country Name (2 letter code) [XX]: <-- 输入国家名,如CN (e.g., "DE").
State or Province Name (full name) []: <-- 输入省份,如BJ,SH,GZ.
Locality Name (eg, city) [Default City]: <-- 输入城市名.
Organization Name (eg, company) [Default Company Ltd]: <-- 输入公司注册(公司)机构名称(e.g., the name of your company).
Organizational Unit Name (eg, section) []: <-- 输入组织机构(e.g. "IT Department").
Common Name (eg, your name or your server's hostname) []: <-- 输入完整的域名(e.g. "server1.example.com").
Email Address []: <-- 输入邮件地址.
添加文件权限
chmod 600 /etc/ssl/private/pure-ftpd.pem
/etc/init.d/pure-ftpd restart
重启pureftpd
安装DNS服务器
yum install bind bind-utils
vi /etc/sysconfig/named
填入以下内容
# BIND named process options
# ~~~~~~~~~~~~~~~~~~~~~~~~~~
# Currently, you can use the following options:
#
# ROOTDIR="/var/named/chroot"  --  will run named in a chroot environment.
#                            you must set up the chroot environment
#                            (install the bind-chroot package) before
#                            doing this.
#       NOTE:
#         Those directories are automatically mounted to chroot if they are
#         empty in the ROOTDIR directory. It will simplify maintenance of your
#         chroot environment.
#          - /var/named
#          - /etc/pki/dnssec-keys
#          - /etc/named
#          - /usr/lib64/bind or /usr/lib/bind (architecture dependent)
#
#         Those files are mounted as well if target file doesn't exist in
#         chroot.
#          - /etc/named.conf
#          - /etc/rndc.conf
#          - /etc/rndc.key
#          - /etc/named.rfc1912.zones
#          - /etc/named.dnssec.keys
#          - /etc/named.iscdlv.key
#
#       Don't forget to add "$AddUnixListenSocket /var/named/chroot/dev/log"
#       line to your /etc/rsyslog.conf file. Otherwise your logging becomes
#       broken when rsyslogd daemon is restarted (due update, for example).
#
# OPTIONS="whatever"     --  These additional options will be passed to named
#                            at startup. Don't add -t here, use ROOTDIR instead.
#
# KEYTAB_FILE="/dir/file"    --  Specify named service keytab file (for GSS-TSIG)
#
# DISABLE_ZONE_CHECKING  -- By default, initscript calls named-checkzone
#                           utility for every zone to ensure all zones are
#                           valid before named starts. If you set this option
#                           to 'yes' then initscript doesn't perform those
#                           checks.
建立DNS区域文件
touch /etc/named.conf.local
配置开机启动
chkconfig --levels 235 named on
/etc/init.d/named start
安装 Vlogger, Webalizer, And AWStats
yum install webalizer awstats perl-DateTime-Format-HTTP perl-DateTime-Format-Builder
安装vlogger
cd /tmp
wget http://n0rp.chemlab.org/vlogger/vlogger-1.3.tar.gz
tar xvfz vlogger-1.3.tar.gz
mv vlogger-1.3/vlogger /usr/sbin/
rm -rf vlogger*
安装 Jailkit
cd /tmp wget http://olivier.sessink.nl/jailkit/jailkit-2.15.tar.gz tar xvfz jailkit-2.15.tar.gz cd jailkit-2.15 ./configure make make install cd .. rm -rf jailkit-2.15*
安装fail2ban
yum install fail2ban
配置 fail2ban
vi /etc/fail2ban/fail2ban.conf
添加
[...]
# Option:  logtarget
# Notes.:  Set the log target. This could be a file, SYSLOG, STDERR or STDOUT.
#          Only one log target can be specified.
# Values:  STDOUT STDERR SYSLOG file  Default:  /var/log/fail2ban.log
#
#logtarget = SYSLOG
logtarget = /var/log/fail2ban.log
[...]
配置开机启动
chkconfig --levels 235 fail2ban on
/etc/init.d/fail2ban start
安装 rkhunter
yum install rkhunter
安装mailman
yum install mailman
新建立一个列表
/usr/lib/mailman/bin/newlist mailman

[root@server1 tmp]# /usr/lib/mailman/bin/newlist mailman
Enter the email of the person running the list: <--输入管理员邮件地址, e.g. listadmin@example.com
Initial mailman password: <-- 输入mailman 列表的管理员密码
To finish creating your mailing list, you must edit your /etc/aliases (or
equivalent) file by adding the following lines, and possibly running the
`newaliases' program:

## mailman mailing list
mailman:              "|/usr/lib/mailman/mail/mailman post mailman"
mailman-admin:        "|/usr/lib/mailman/mail/mailman admin mailman"
mailman-bounces:      "|/usr/lib/mailman/mail/mailman bounces mailman"
mailman-confirm:      "|/usr/lib/mailman/mail/mailman confirm mailman"
mailman-join:         "|/usr/lib/mailman/mail/mailman join mailman"
mailman-leave:        "|/usr/lib/mailman/mail/mailman leave mailman"
mailman-owner:        "|/usr/lib/mailman/mail/mailman owner mailman"
mailman-request:      "|/usr/lib/mailman/mail/mailman request mailman"
mailman-subscribe:    "|/usr/lib/mailman/mail/mailman subscribe mailman"
mailman-unsubscribe:  "|/usr/lib/mailman/mail/mailman unsubscribe mailman"

Hit enter to notify mailman owner... <-- 回车
配置别名
vi /etc/aliases 添加
[...]
mailman:              "|/usr/lib/mailman/mail/mailman post mailman"
mailman-admin:        "|/usr/lib/mailman/mail/mailman admin mailman"
mailman-bounces:      "|/usr/lib/mailman/mail/mailman bounces mailman"
mailman-confirm:      "|/usr/lib/mailman/mail/mailman confirm mailman"
mailman-join:         "|/usr/lib/mailman/mail/mailman join mailman"
mailman-leave:        "|/usr/lib/mailman/mail/mailman leave mailman"
mailman-owner:        "|/usr/lib/mailman/mail/mailman owner mailman"
mailman-request:      "|/usr/lib/mailman/mail/mailman request mailman"
mailman-subscribe:    "|/usr/lib/mailman/mail/mailman subscribe mailman"
mailman-unsubscribe:  "|/usr/lib/mailman/mail/mailman
生成数据库
newaliases
重启postfix
/etc/init.d/postfix restart
添加mailman apache配置
vi /etc/httpd/conf.d/mailman.conf
添加以下行
#
#  httpd configuration settings for use with mailman.
#

ScriptAlias /mailman/ /usr/lib/mailman/cgi-bin/
ScriptAlias /cgi-bin/mailman/ /usr/lib/mailman/cgi-bin/
<Directory /usr/lib/mailman/cgi-bin/>
    AllowOverride None
    Options ExecCGI
    Order allow,deny
    Allow from all
</Directory>

#Alias /pipermail/ /var/lib/mailman/archives/public/
Alias /pipermail /var/lib/mailman/archives/public/
<Directory /var/lib/mailman/archives/public>
    Options Indexes MultiViews FollowSymLinks
    AllowOverride None
    Order allow,deny
    Allow from all
    AddDefaultCharset Off
</Directory>

# Uncomment the following line, to redirect queries to /mailman to the
# listinfo page (recommended).

# RedirectMatch ^/mailman[/]*$ /mailman/listinfo
重启apache
/etc/init.d/httpd restart
配置mailman
chkconfig --levels 235 mailman on
/etc/init.d/mailman start
安装SquirrelMail
yum install squirrelmail
重启apache
/etc/init.d/httpd restart
配置squirreimail
/usr/share/squirrelmail/config/conf.pl
SquirrelMail Configuration : Read: config.php (1.4.0)
---------------------------------------------------------
Main Menu --
1.  Organization Preferences
2.  Server Settings
3.  Folder Defaults
4.  General Options
5.  Themes
6.  Address Books
7.  Message of the Day (MOTD)
8.  Plugins
9.  Database
10. Languages

D.  Set pre-defined settings for specific IMAP servers

C   Turn color off
S   Save data
Q   Quit

Command >> 输入 D

SquirrelMail Configuration : Read: config.php
---------------------------------------------------------
While we have been building SquirrelMail, we have discovered some
preferences that work better with some servers that don't work so
well with others.  If you select your IMAP server, this option will
set some pre-defined settings for that server.

Please note that you will still need to go through and make sure
everything is correct.  This does not change everything.  There are
only a few settings that this will change.

Please select your IMAP server:
    bincimap    = Binc IMAP server
    courier     = Courier IMAP server
    cyrus       = Cyrus IMAP server
    dovecot     = Dovecot Secure IMAP server
    exchange    = Microsoft Exchange IMAP server
    hmailserver = hMailServer
    macosx      = Mac OS X Mailserver
    mercury32   = Mercury/32
    uw          = University of Washington's IMAP server
    gmail       = IMAP access to Google mail (Gmail) accounts

    quit        = Do not change anything
Command >> 输入 dovecot

SquirrelMail Configuration : Read: config.php
---------------------------------------------------------
While we have been building SquirrelMail, we have discovered some
preferences that work better with some servers that don't work so
well with others.  If you select your IMAP server, this option will
set some pre-defined settings for that server.

Please note that you will still need to go through and make sure
everything is correct.  This does not change everything.  There are
only a few settings that this will change.

Please select your IMAP server:
    bincimap    = Binc IMAP server
    courier     = Courier IMAP server
    cyrus       = Cyrus IMAP server
    dovecot     = Dovecot Secure IMAP server
    exchange    = Microsoft Exchange IMAP server
    hmailserver = hMailServer
    macosx      = Mac OS X Mailserver
    mercury32   = Mercury/32
    uw          = University of Washington's IMAP server
    gmail       = IMAP access to Google mail (Gmail) accounts

    quit        = Do not change anything
Command >> courier

              imap_server_type = courier
         default_folder_prefix = INBOX.
                  trash_folder = Trash
                   sent_folder = Sent
                  draft_folder = Drafts
            show_prefix_option = false
          default_sub_of_inbox = false
show_contain_subfolders_option = false
            optional_delimiter = .
                 delete_folder = true

Press enter to continue... <-- 按回车继续

SquirrelMail Configuration : Read: config.php (1.4.0)
---------------------------------------------------------
Main Menu --
1.  Organization Preferences
2.  Server Settings
3.  Folder Defaults
4.  General Options
5.  Themes
6.  Address Books
7.  Message of the Day (MOTD)
8.  Plugins
9.  Database
10. Languages

D.  Set pre-defined settings for specific IMAP servers

C   Turn color off
S   Save data
Q   Quit

Command >> 输入 S

SquirrelMail Configuration : Read: config.php (1.4.0)
---------------------------------------------------------
Main Menu --
1.  Organization Preferences
2.  Server Settings
3.  Folder Defaults
4.  General Options
5.  Themes
6.  Address Books
7.  Message of the Day (MOTD)
8.  Plugins
9.  Database
10. Languages

D.  Set pre-defined settings for specific IMAP servers

C   Turn color off
S   Save data
Q   Quit

Command >> 输入Q
编辑配置文件
vi /etc/squirrelmail/config_local.php
<?php

/**
 * Local config overrides.
 *
 * You can override the config.php settings here.
 * Don't do it unless you know what you're doing.
 * Use standard PHP syntax, see config.php for examples.
 *
 * @copyright © 2002-2006 The SquirrelMail Project Team
 * @license http://opensource.org/licenses/gpl-license.php GNU Public License
 * @version $Id: config_local.php,v 1.2 2006/07/11 03:33:47 wtogami Exp $
 * @package squirrelmail
 * @subpackage config
 */

//$default_folder_prefix                = '';
?>
现在可以浏览http://192.168.0.100/webmail 来访问web 邮件系统
安装ispconfig 3
cd /tmp
wget http://www.ispconfig.org/downloads/ISPConfig-3-stable.tar.gz
tar xfz ISPConfig-3-stable.tar.gz
cd ispconfig3_install/install/
执行 php -q install.php
--------------------------------------------------------------------------------
 _____ ___________   _____              __ _         ____
|_   _/  ___| ___ \ /  __ \            / _(_)       /__  \
  | | \ `--.| |_/ / | /  \/ ___  _ __ | |_ _  __ _    _/ /
  | |  `--. \  __/  | |    / _ \| '_ \|  _| |/ _` |  |_ |
 _| |_/\__/ / |     | \__/\ (_) | | | | | | | (_| | ___\ \
 \___/\____/\_|      \____/\___/|_| |_|_| |_|\__, | \____/
                                              __/ |
                                             |___/
--------------------------------------------------------------------------------

>> Initial configuration

Operating System: Redhat or compatible, unknown version.

    Following will be a few questions for primary configuration so be careful.
    Default values are in [brackets] and can be accepted with <ENTER>.
    Tap in "quit" (without the quotes) to stop the installer.

Select language (en,de) [en]: <-- 语言选择,英文默认 回车

Installation mode (standard,expert) [standard]: <-- 安装模式 标准 回车

Full qualified hostname (FQDN) of the server, eg server1.domain.tld  [server1.example.com]: <-- ENTER

MySQL server hostname [localhost]: <-- 回车

MySQL root username [root]: <-- 回车

MySQL root password []: <-- 输入mysql root密码
MySQL database to create [dbispconfig]: <-- 回车

MySQL charset [utf8]: <-- 数据库编码utf8 回车

Generating a 2048 bit RSA private key
..........................................................+++
................................+++
writing new private key to 'smtpd.key'
-----
You are about to be asked to enter information that will be incorporated
into your certificate request.
What you are about to enter is what is called a Distinguished Name or a DN.
There are quite a few fields but you can leave some blank
For some fields there will be a default value,
If you enter '.', the field will be left blank.
-----
Country Name (2 letter code) [XX]: <-- 回车
State or Province Name (full name) []: <-- 回车
Locality Name (eg, city) [Default City]: <-- 回车
Organization Name (eg, company) [Default Company Ltd]: <-- 回车
Organizational Unit Name (eg, section) []: <-- 回车
Common Name (eg, your name or your server's hostname) []: <-- 回车
Email Address []: <-- 回车
Configuring Jailkit
Configuring Dovecot
Configuring Spamassassin
Configuring Amavisd
Configuring Getmail
Configuring Pureftpd
Configuring BIND
Configuring Apache
Configuring Vlogger
Configuring Apps vhost
Configuring Bastille Firewall
Configuring Fail2ban
Installing ISPConfig
ISPConfig Port [8080]: <-- 回车

Do you want a secure (SSL) connection to the ISPConfig web interface (y,n) [y]: <-- ENTER

Generating RSA private key, 4096 bit long modulus
.....................++
.......++
e is 65537 (0x10001)
You are about to be asked to enter information that will be incorporated
into your certificate request.
What you are about to enter is what is called a Distinguished Name or a DN.
There are quite a few fields but you can leave some blank
For some fields there will be a default value,
If you enter '.', the field will be left blank.
-----
Country Name (2 letter code) [XX]: <-- 回车
State or Province Name (full name) []: <-- 回车
Locality Name (eg, city) [Default City]: <-- 回车
Organization Name (eg, company) [Default Company Ltd]: <-- 回车
Organizational Unit Name (eg, section) []: <-- 回车
Common Name (eg, your name or your server's hostname) []: <-- 回车
Email Address []: <-- 回车

Please enter the following 'extra' attributes
to be sent with your certificate request
A challenge password []: <-- 回车
An optional company name []: <-- 回车
writing RSA key
Configuring DBServer
Installing ISPConfig crontab
no crontab for root
no crontab for getmail
Restarting services ...
Stopping mysqld:                                           [  OK  ]
Starting mysqld:                                           [  OK  ]
Shutting down postfix:                                     [  OK  ]
Starting postfix:                                          [  OK  ]
Stopping saslauthd:                                        [FAILED]
Starting saslauthd:                                        [  OK  ]
Waiting for the process [1424] to terminate
Shutting down amavisd: Daemon [1424] terminated by SIGTERM
                                                           [  OK  ]
amavisd stopped
Starting amavisd:                                          [  OK  ]

Stopping clamd.amavisd:                                    [  OK  ]
Starting clamd.amavisd:                                    [  OK  ]
Stopping Dovecot Imap:                                     [  OK  ]
Starting Dovecot Imap:                                     [  OK  ]
Stopping httpd:                                            [  OK  ]
[Thu Jul 12 19:02:33 2012] [warn] NameVirtualHost *:80 has no VirtualHosts
Starting httpd:                                            [  OK  ]
Stopping pure-ftpd:                                        [  OK  ]
Starting pure-ftpd:                                        [  OK  ]
Installation completed.
[root@server1 install]#
修复mailman 导致的ispconfig3 安装错误
vi /usr/lib/mailman/Mailman/mm_cfg.py
配置
[...]
#-------------------------------------------------------------
# The default language for this server.
DEFAULT_SERVER_LANGUAGE = 'en'
[...]
重启
/etc/init.d/mailman restart
配置dovecot
cd /etc/dovecot
mv dovecot.conf dovecot.conf_orig
ln -s ../dovecot.conf dovecot.conf
/etc/init.d/dovecot restart


评论关闭。